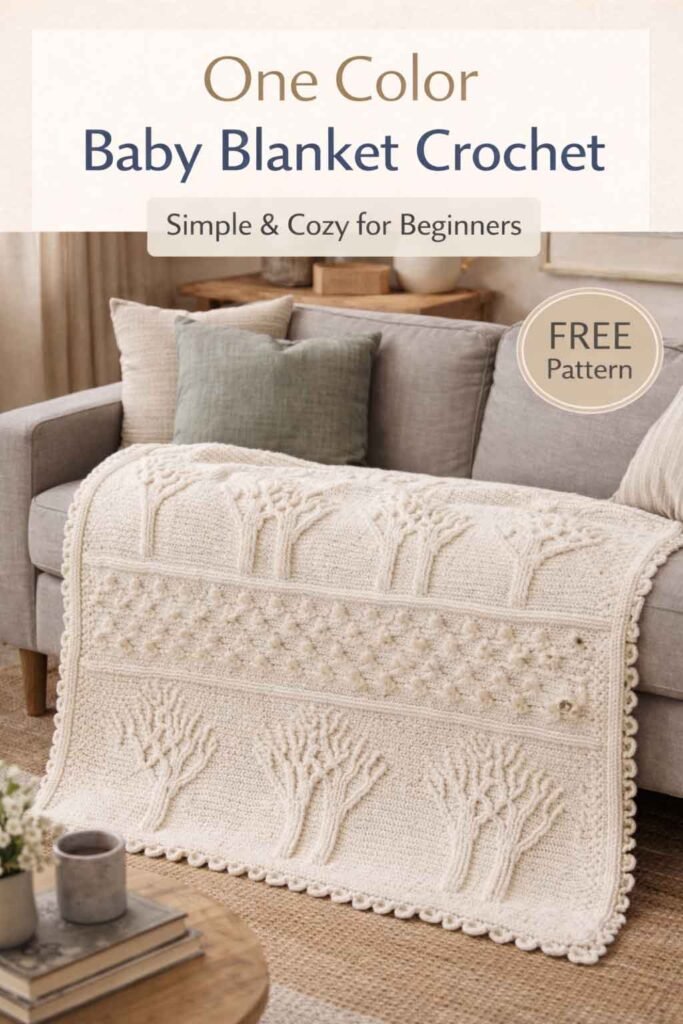
If you love simple, timeless projects, these 2 Easy One-Color Baby Blanket Crochet Designs (Beginner Friendly) are perfect to start with.
They focus on clean texture, soft drape, and easy repeats — no complicated color changes, just beautiful stitch work that lets the yarn shine.
Whether you’re making a gift or preparing for a new arrival, these blankets are calming to crochet and elegant when finished.
If you’re specifically searching for a Lightweight crochet baby blanket pattern free, this guide will help you create soft, breathable blankets that feel cozy without being heavy.
Both designs are beginner-approved, easy to adjust in size, and ideal for year-round use. Continue reading to learn how to create these beautiful blankets step by step.
One Color Baby Blanket Crochet white Version
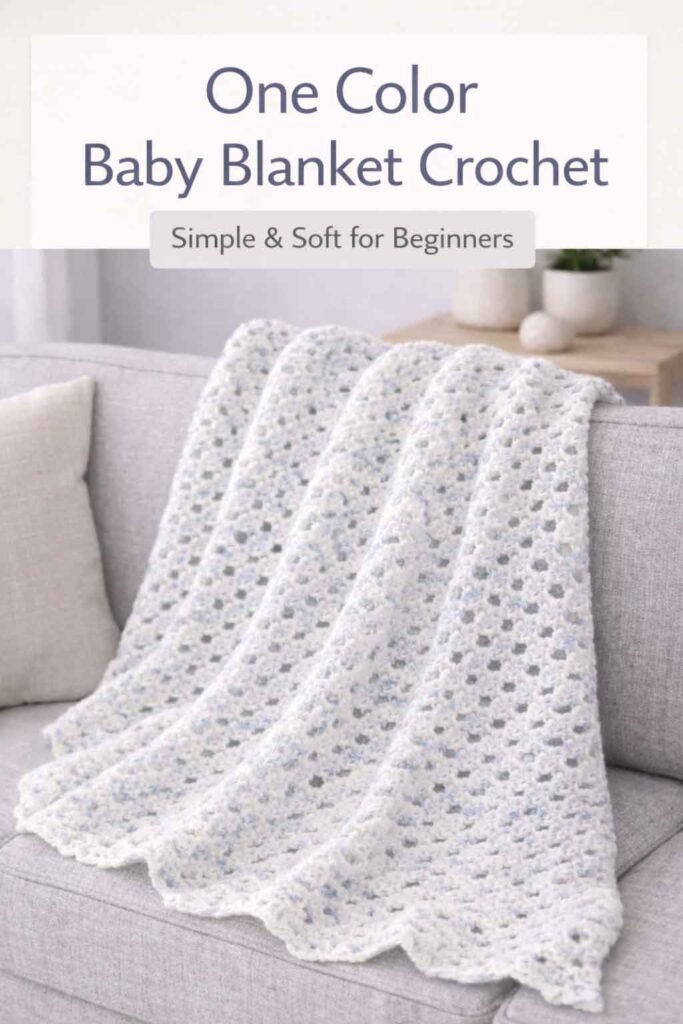
This is a lacy granny-stripe baby blanket made with 3 double-crochet (dc) clusters.
The fabric looks light, soft, and airy—very similar to the blanket in your photo.
You repeat the same row again and again, then finish with a clean border and a scalloped edge.
Skill level
Beginner-friendly. If you can do chain + double crochet + single crochet, you can make this.
Sizes you can copy
Choose any size. Use this chart as a simple guide.
| Size | Approx. finished size | Starting chain (multiple of 3 + 2) | Rows for length (approx.) |
|---|---|---|---|
| Stroller | 30″ × 36″ | 71 | 36 |
| Receiving | 36″ × 40″ | 83 | 40 |
| Crib | 45″ × 60″ | 107 | 60 |
Important: row count changes with yarn, hook, and tension. Stop when your blanket reaches the length you like.
Materials
| Item | Recommendation | Notes |
|---|---|---|
| Yarn | DK (3) or Worsted (4) | The photo looks like soft white; tiny speckles are optional. |
| Hook | 5.0 mm to 6.0 mm | Bigger hook = lacier + softer drape like the photo. |
| Extras | scissors, yarn needle, measuring tape | Stitch markers optional (helps with edges). |
Yarn amount (helpful estimates)
These are safe “ballpark” ranges for one-color blankets.
| Size | DK (3) | Worsted (4) |
|---|---|---|
| Stroller | 700–1000 yd (640–915 m) | 600–900 yd (550–825 m) |
| Receiving | 900–1300 yd (825–1190 m) | 800–1200 yd (730–1100 m) |
| Crib | 1400–2200 yd (1280–2010 m) | 1200–2000 yd (1100–1830 m) |
If you add a thick border, you’ll use more yarn.
Stitch guide (US terms)
| Abbrev | Meaning |
|---|---|
| ch | chain |
| sc | single crochet |
| dc | double crochet |
| sl st | slip stitch |
| sp | space (gap between clusters) |
| sk | skip |
| rep | repeat |
How the stitch works (so it doesn’t feel confusing)
This blanket uses the classic granny cluster:
- Granny cluster = 3 dc in the same space
- You crochet mostly into the spaces between clusters, not into every stitch.
- The turning chain (ch 3) counts as 1 dc at the edge.
That’s the whole “secret” of granny stripe.
Before you start (quick setup that saves mistakes)
- Pick your hook (start with 6.0 mm if you want it airy like the photo).
- Make a tiny test strip (optional but smart):
- Chain 23 and do a few rows.
- If it feels stiff, go up a hook size.
- If it looks too open, go down a hook size.
Step 1 — Foundation chain (width)
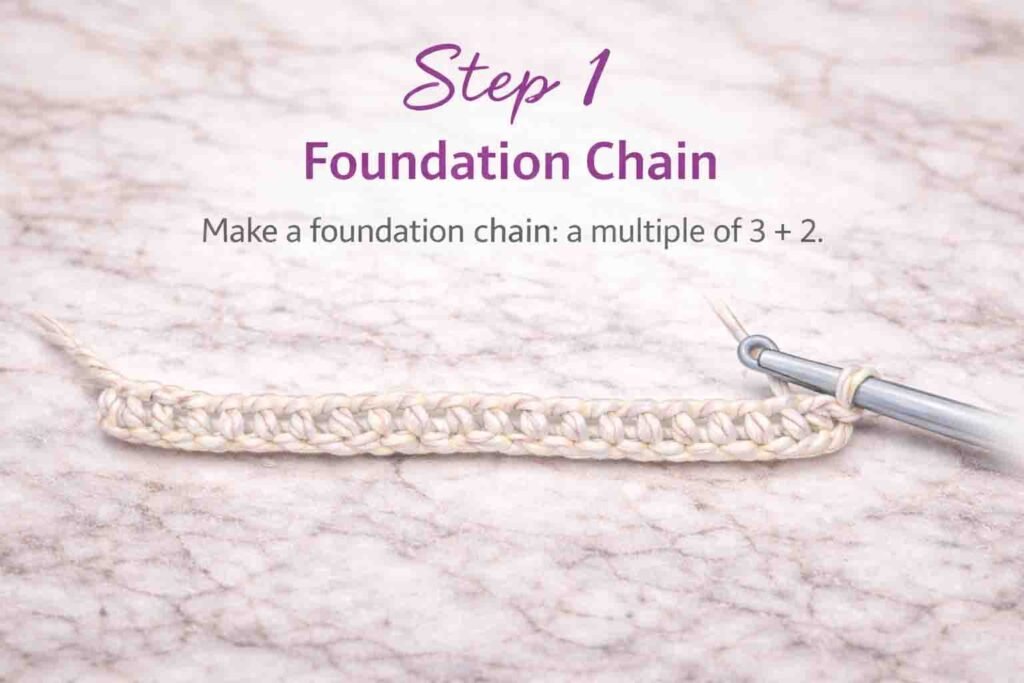
You need: multiple of 3 + 2
A clean way to think about it:
- Every “chunk” across is 3 chains
- Then you add 2 extra chains at the end
Examples:
- 71, 83, 107 from the size chart all follow that rule.
Step 2 — Row 1 (setup row)
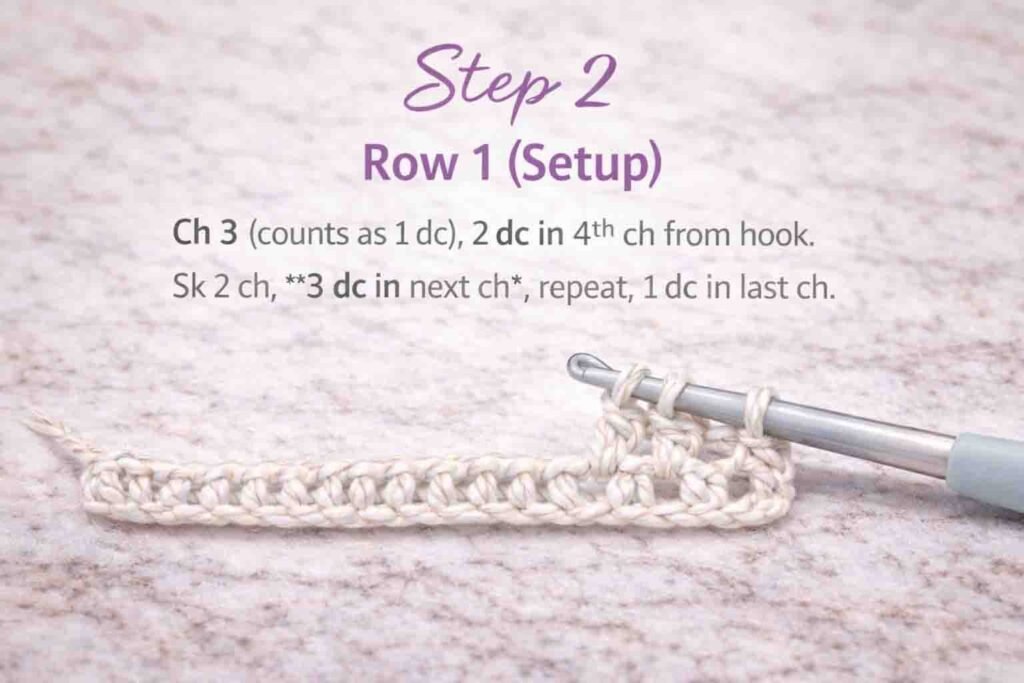
This row creates the first line of clusters.
- Ch 3 (counts as 1 dc).
- In the 4th ch from the hook, work 2 dc.
You now have an edge group that behaves like a full cluster. - Sk 2 ch, 3 dc in next ch.
- Rep across: sk 2 ch, 3 dc in next ch
- Finish the row:
- sk 2 ch
- 1 dc in the last ch
What you should see:
Little 3-dc “groups” with small open gaps between them.
Step 3 — Row 2 (the repeat row)
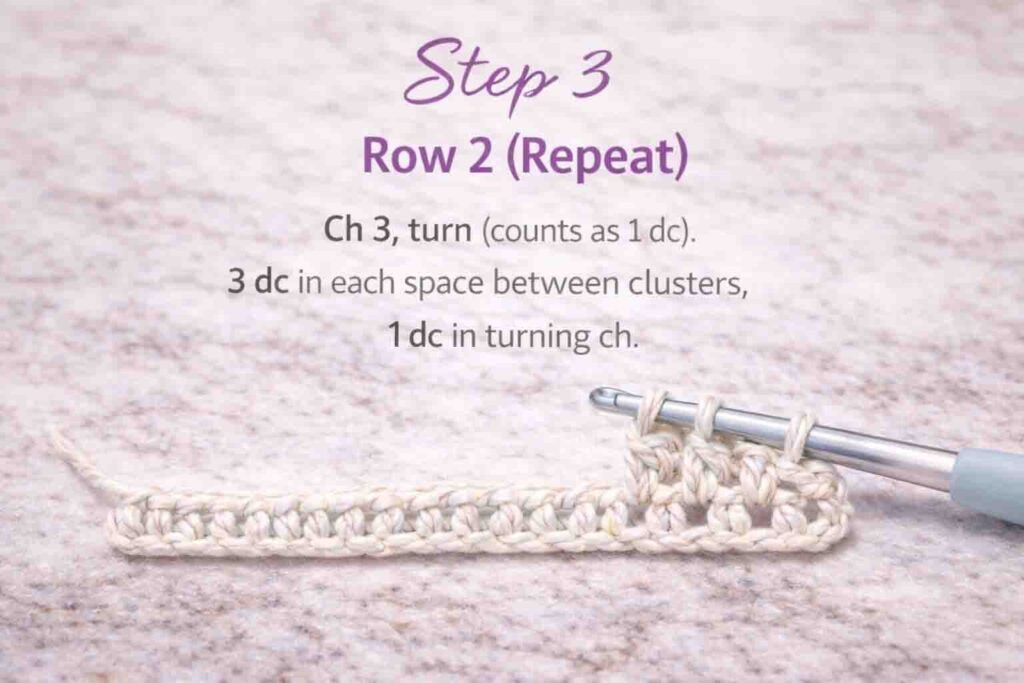
This is the row you will repeat for almost the entire blanket.
- Ch 3, turn (counts as 1 dc).
- Find the first space between the clusters (that gap).
- Work 3 dc into that space.
- Keep going across: 3 dc in each space between clusters.
- At the end, work 1 dc into the top of the turning chain from the previous row.
Edge tip (makes it neat):
That last dc goes into the top “V” of the turning chain, not into a random gap.
Step 4 — Repeat Row 2 (build length)
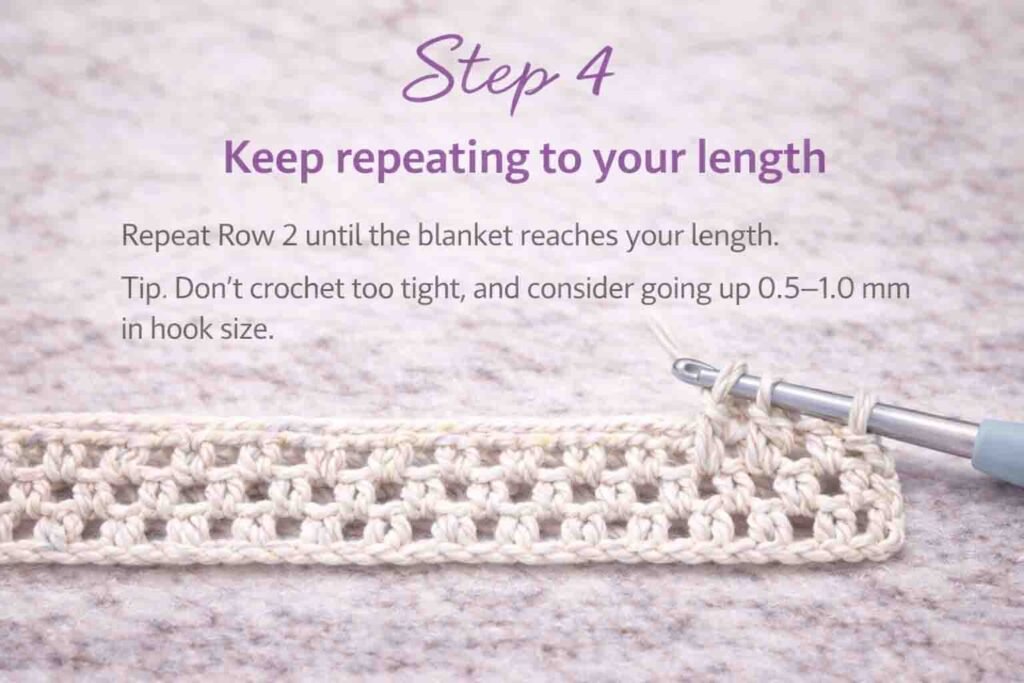
Keep repeating Row 2 until you reach your length.
To keep your blanket straight:
- Your first “cluster” of every row goes into the first space
- Your last stitch is always 1 dc into the turning chain
If the sides start leaning:
- Your edge dc is probably being placed in the wrong spot (very common).
- Slow down and clearly find the top of the ch-3 at the end of every row.
Step 5 — Fasten off (main blanket done)
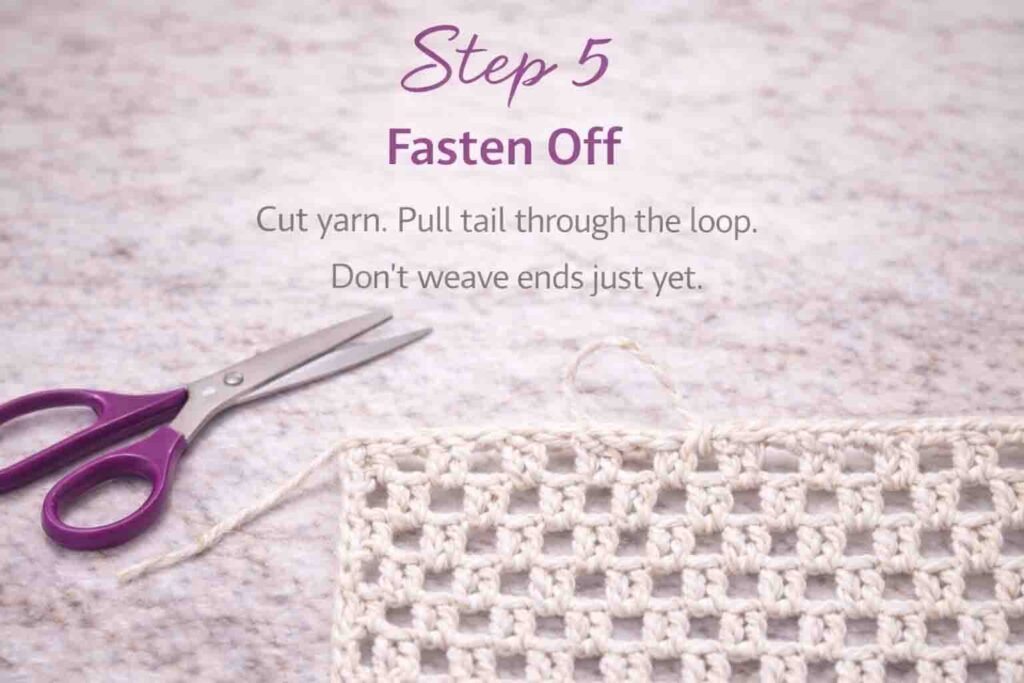
- Cut yarn (leave a tail).
- Pull tail through the loop.
- Don’t weave ends yet if you want to check the border look first.
Border planning (why your border might ripple)
Borders look best when the stitches match the fabric.
Two key rules:
- Too many stitches = wavy border
- Too few stitches = curled border
So we’ll do it in 3 rounds:
- sc outline (controls shape)
- dc round (gives thickness)
- scallop round (pretty finish)
Step 6 — Border Round 1 (single crochet outline)
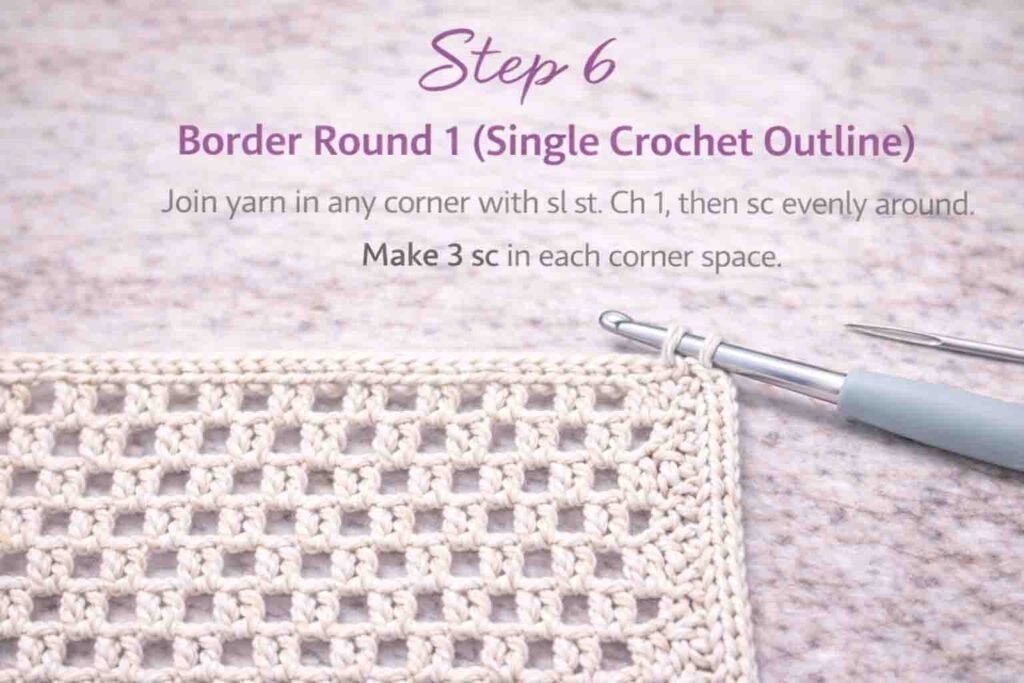
- Join yarn in any corner with sl st.
- Ch 1, then sc evenly around.
- In each corner, do 3 sc in the same corner space.
- Sl st to the first sc to join.
How to place sc on the long sides (super important):
- On the row ends, you’re stitching into the “side of rows,” not clear stitches.
- Start with this simple guideline:
- 2 sc per cluster group along the sides
- If it ripples, reduce a little. If it pulls tight, add a little.
Simple check:
Lay it flat after Round 1. If it lies flat, you’re perfect.
Step 7 — Border Round 2 (double crochet frame)
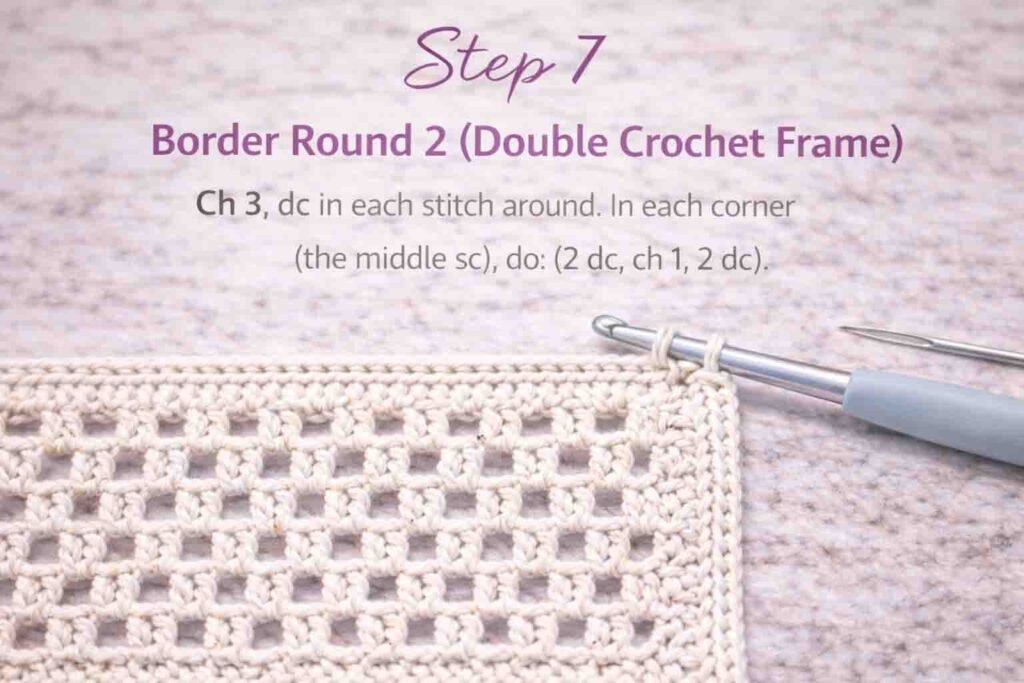
- Ch 3 (counts as dc).
- Dc in each stitch around.
- In each corner (middle of the 3-sc corner), do:
(2 dc, ch 1, 2 dc) into that corner stitch. - Sl st to join.
This round makes the edge look more finished and closer to the photo style.
Step 8 — Border Round 3 (scallop / shell edge)
This creates the soft “baby blanket” finish.
- Ch 1.
- Repeat around:
- sc in next st
- sk 1 st
- 5 dc in next st (shell)
- sk 1 st
- Keep repeating.
- If you hit a corner and it feels tight, make the corner shell bigger only if needed:
- Use 7 dc in that shell (instead of 5).
- Sl st to join, fasten off.
How to make shells look evenly spaced:
If you notice shells stacking awkwardly near the end, you can “cheat” once:
- Do sk 2 one time, or
- Do sk 0 one time
Just to make the last shell sit nicely before joining.
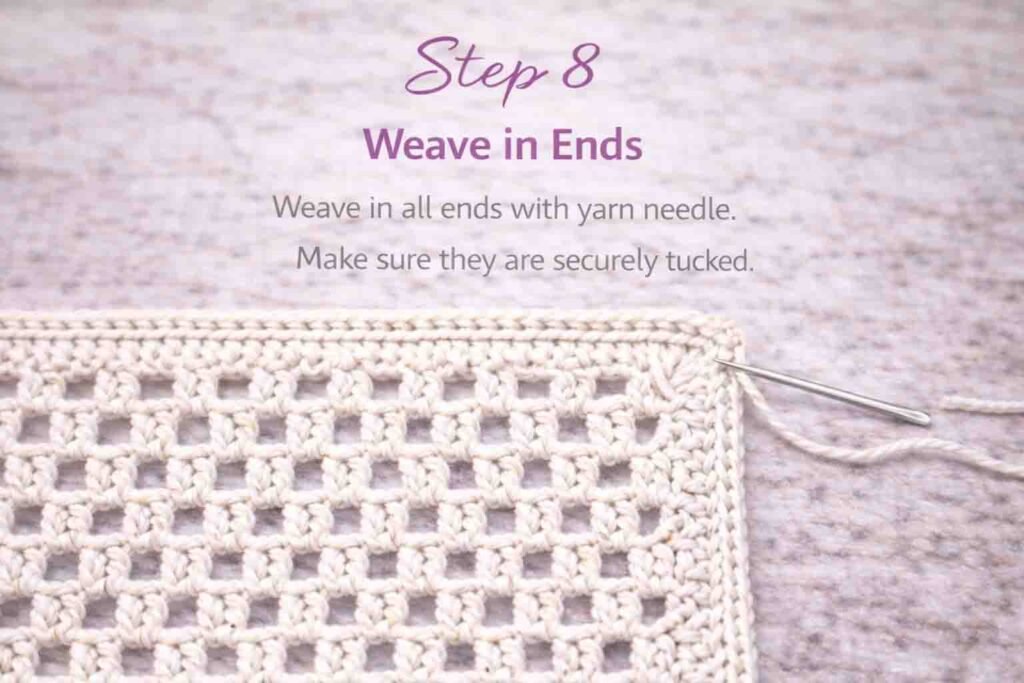
Weaving in ends (clean + invisible)
- Thread your yarn needle.
- Weave through the backs of stitches in 3 directions (like a zigzag path).
- Pull gently, snip close.
- Avoid weaving only in one straight line (it can slip out after washing).
Blocking (this is what makes it look like the photo)
Blocking opens the lace and smooths the scallops.
Easy home blocking:
- Lightly wet the blanket (spray bottle or quick rinse).
- Lay flat on a towel or foam mat.
- Gently stretch to a neat rectangle.
- Pin the corners if you can.
- Let dry completely.
Common problems and quick fixes
| Problem | Why it happens | Fix |
|---|---|---|
| Sides look bumpy | Last dc not placed in top of turning chain | Put the final dc into the top of ch-3 every time |
| Blanket leans | Skipping a space or adding an extra cluster | Count spaces across sometimes to confirm |
| Border ripples | Too many sc along sides | Reduce side sc (try 1 sc per cluster sometimes) |
| Border curls | Too few sc along sides | Add a few extra sc evenly along sides |
| Corner pulls tight | Not enough corner stitches | Use 3 sc corners in Round 1, and (2dc,ch1,2dc) in Round 2 |
Finishing touches
- Use soft white yarn with a slightly larger hook for drape.
- Keep tension relaxed (don’t tug the yarn).
- Block it—this is what makes the lace look clean and expensive.
READ: Granny Square Baby Blanket Crochet Pattern
2. One-Color Woodland Relief Blanket Crochet Pattern
This is a full, start-to-finish pattern to create the blanket. The look comes from 3 things:
- a dense ribbed base fabric
- raised “tree/grass lines” made with surface crochet
- a meadow panel made with 3D popcorn bumps
Finished Size
This pattern is written for a throw-style blanket close to the photo.
| Size | Width | Length |
|---|---|---|
| Written size | ~50 in | ~60 in |
You can scale it, but I’m giving you exact stitch counts for this size.
Materials
| Item | Amount |
|---|---|
| Worsted weight yarn (4) | ~1600–2200 yards |
| Hook for blanket | 5.0 mm |
| Hook for surface crochet (trees) | 4.0–4.5 mm (helps definition) |
| Yarn needle | weaving ends |
| Stitch markers | optional but helpful |
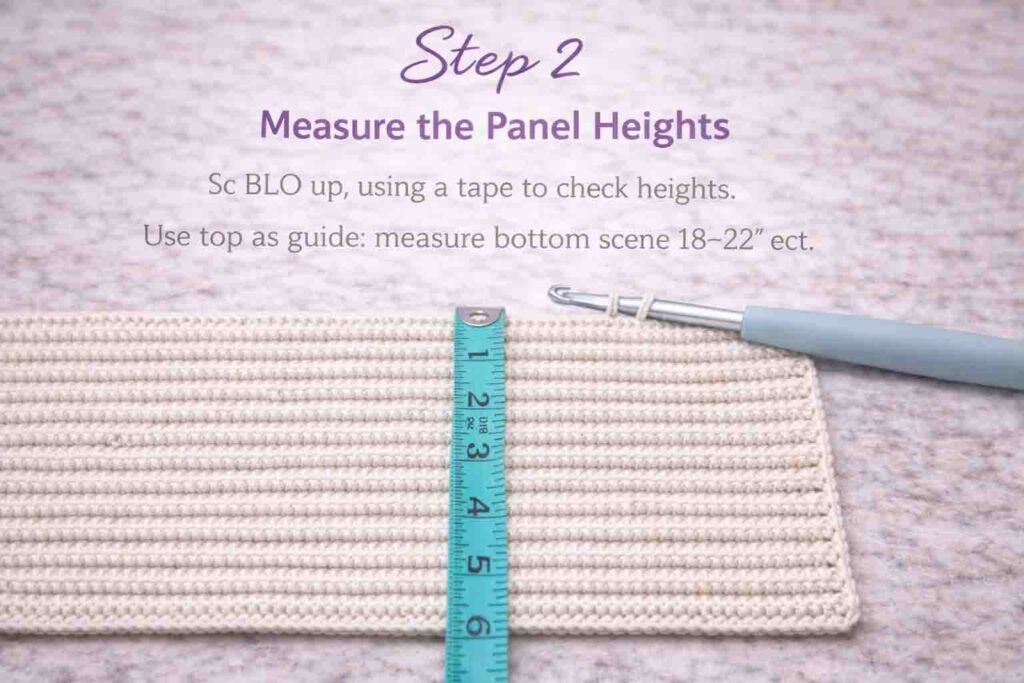
Gauge (important for matching size)
Make a swatch in single crochet back loop only (sc BLO).
| Gauge | Measurement |
|---|---|
| 16 sc | 4 inches |
| 18 rows | 4 inches |
If your swatch is smaller, go up a hook. If bigger, go down.
Abbreviations (US terms)
| Term | Meaning |
|---|---|
| ch | chain |
| sc | single crochet |
| BLO | back loop only |
| sl st | slip stitch |
| dc | double crochet |
| pc | popcorn |
| RS/WS | right side / wrong side |
| rep | repeat |
Special Stitches
Popcorn (pc)
In indicated stitch:
- Work 5 dc in the same stitch
- Pull hook out of loop (don’t lose it)
- Insert hook into top of the first dc of the 5-dc group
- Grab dropped loop and pull it through
- Ch 1 to lock the popcorn
Tip: Push the bump to the RS.
Surface Slip Stitch (Surface sl st)
Used to “draw” trees/grass on top of the fabric:
- With RS facing you, insert hook front-to-back at start point
- Pull yarn loop to front
- Insert hook into next point, yarn over, pull loop through fabric and through loop on hook
That creates a raised line like in your photo.
Surface Single Crochet (Surface sc)
Thicker than surface sl st (good for trunks):
Insert hook, pull up loop, yarn over, pull through 2 loops.
Blanket Layout (same structure as photo)
Your blanket is worked bottom → top in sections.
| Section | Rows (written size) | Texture |
|---|---|---|
| Bottom plain band | 12 rows | sc BLO |
| Bottom “tree/grass” panel | 90 rows | sc BLO (motifs added later) |
| Divider band 1 | 6 rows | sc (both loops) |
| Meadow / popcorn panel | 54 rows | popcorn + sc |
| Divider band 2 | 6 rows | sc (both loops) |
| Top “tree” panel | 72 rows | sc BLO (motifs added later) |
| Top plain band | 12 rows | sc BLO |
Total base rows = 252 rows (border adds more length).
Base Blanket Instructions (full stitch counts)
Foundation
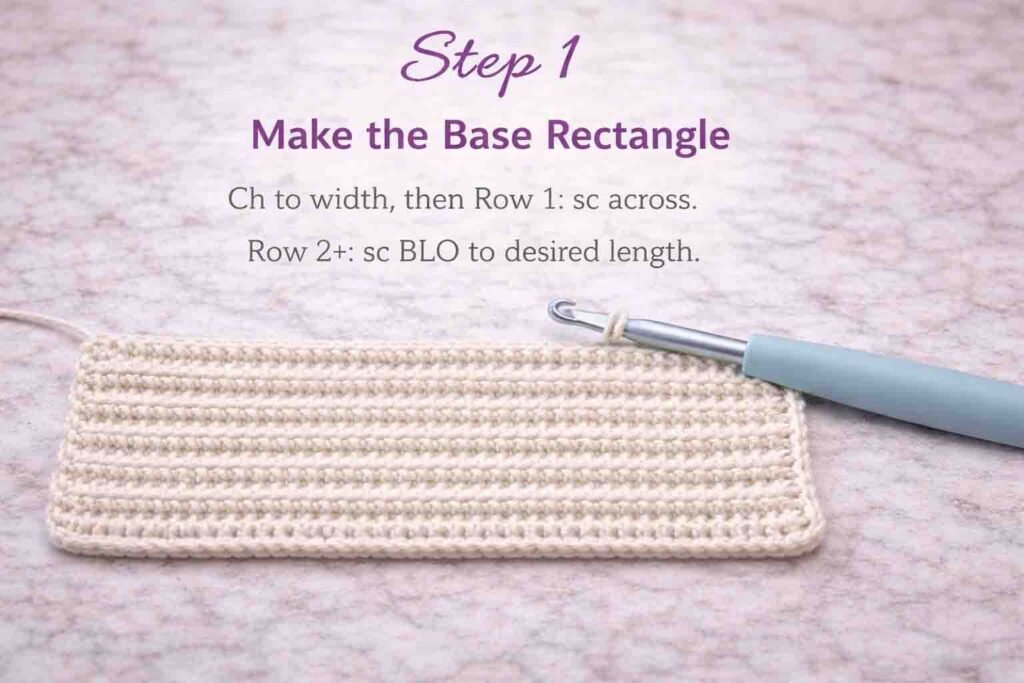
- Ch 201
- Row 1 (RS): sc in 2nd ch from hook and across = 200 sc
- Turn
Bottom plain band
- Rows 2–12: ch 1, sc BLO across (200 sc each row)
Turn each row.
Bottom panel (trees/grass will be added later)
- Rows 13–102: ch 1, sc BLO across (200 sc each row)
Divider band 1 (creates the raised separator look)
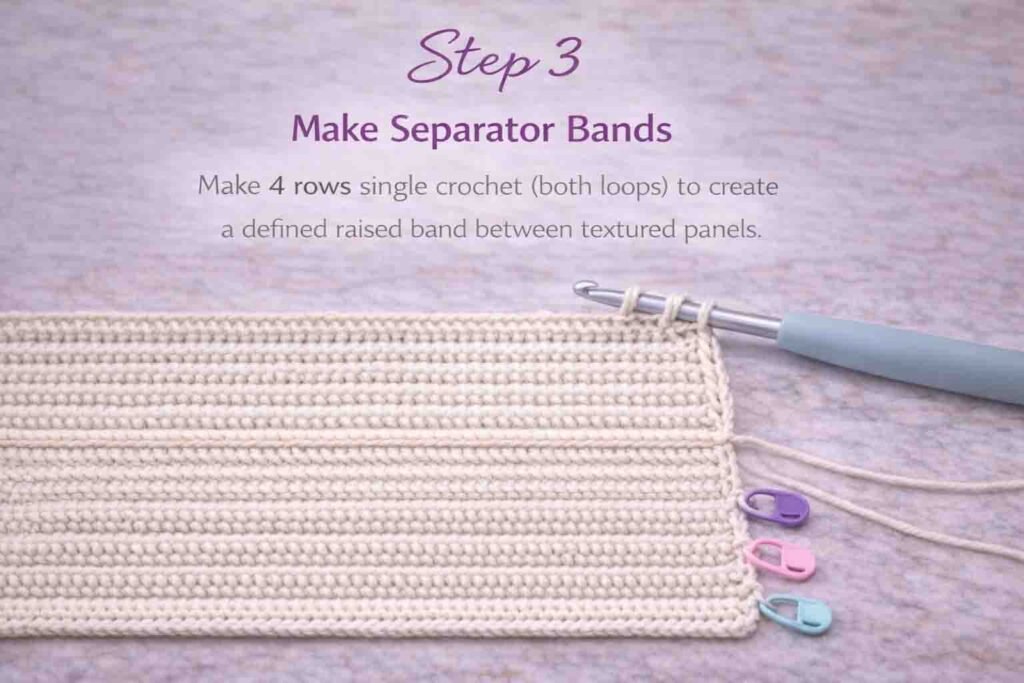
- Rows 103–108: ch 1, sc across (both loops)
Meadow panel (popcorn “field”)
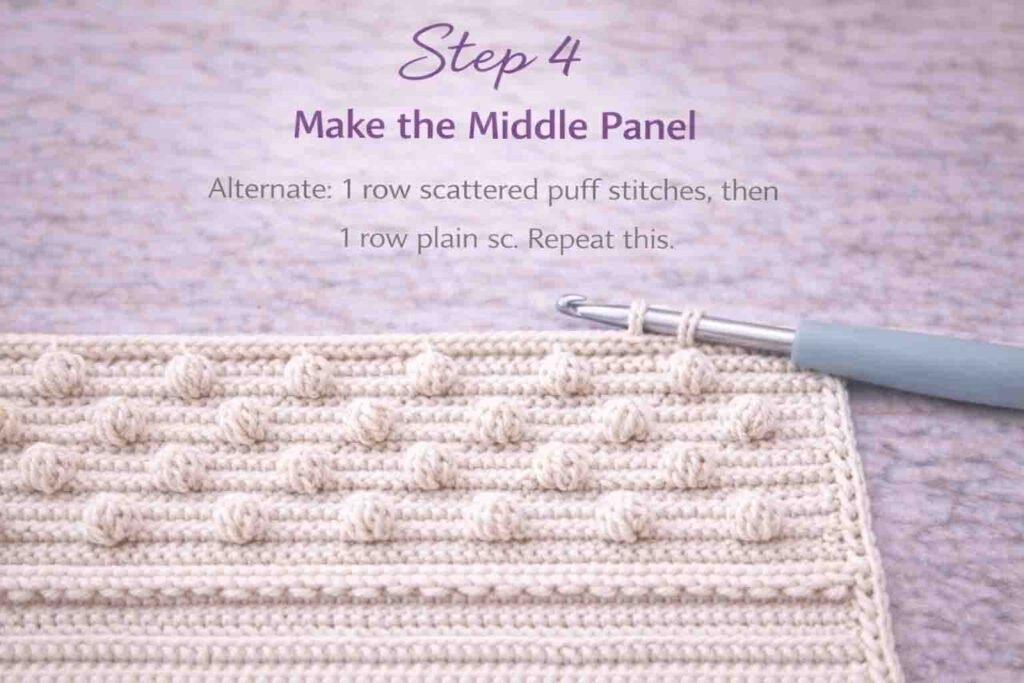
This panel is 54 rows, made from a repeating 6-row block.
You’ll repeat this 6-row block 9 times (9 × 6 = 54).
6-row Meadow Block
Row A (RS – Popcorn Row):
- ch 1, sc 10
- (pc in next st, sc 5) rep 30 times
- sc 10
(You will have 30 popcorns in this row)
Row B (WS – Plain):
- ch 1, sc BLO across
Row C (RS – Plain):
- ch 1, sc BLO across
Row D (WS – Offset Popcorn Row):
- ch 1, sc 13
- (pc in next st, sc 5) rep 29 times
- pc in next st
- sc 12
(You will also have 30 popcorns, shifted)
Row E (RS – Plain):
- ch 1, sc BLO across
Row F (WS – Plain):
- ch 1, sc BLO across
Now repeat Meadow Block 9 times total.
Divider band 2
- Rows 163–168: ch 1, sc across (both loops)
Top panel (trees added later)
- Rows 169–240: ch 1, sc BLO across
Top plain band
- Rows 241–252: ch 1, sc BLO across
Fasten off.
Raised Motifs (Trees + Grass)
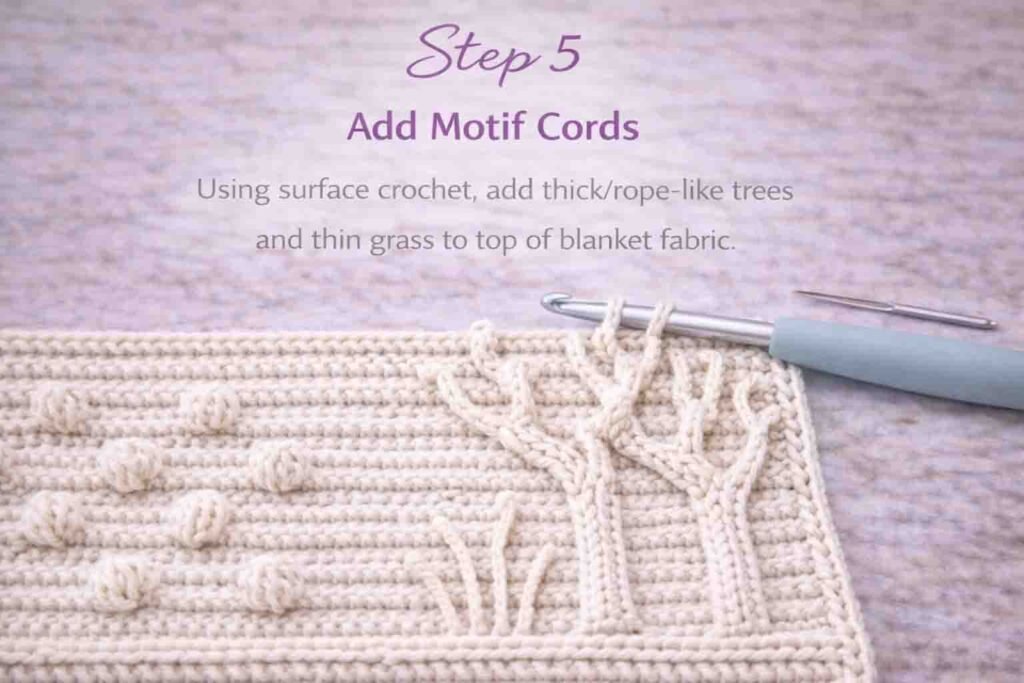
You will now “draw” the landscape using surface crochet on the RS.
Simple placement system (so it’s repeatable)
Your blanket width is 200 stitches. Think of it like columns 1–200.
Also, each panel has its own row range:
- Bottom panel: rows 13–102
- Top panel: rows 169–240
You’ll place motifs inside those areas.
Surface crochet setup
- Put blanket RS facing up
- Use 4.0–4.5 mm hook (cleaner lines)
- Attach yarn at motif start with a loop pulled to front
How to make trunks look thick like the photo
Do trunks as 2 parallel surface lines:
- Work one surface sc line up
- Then work a second line right next to it (1 stitch column over)
Branches can be surface sl st (thinner).
Bottom Panel Motifs (rows 13–102)
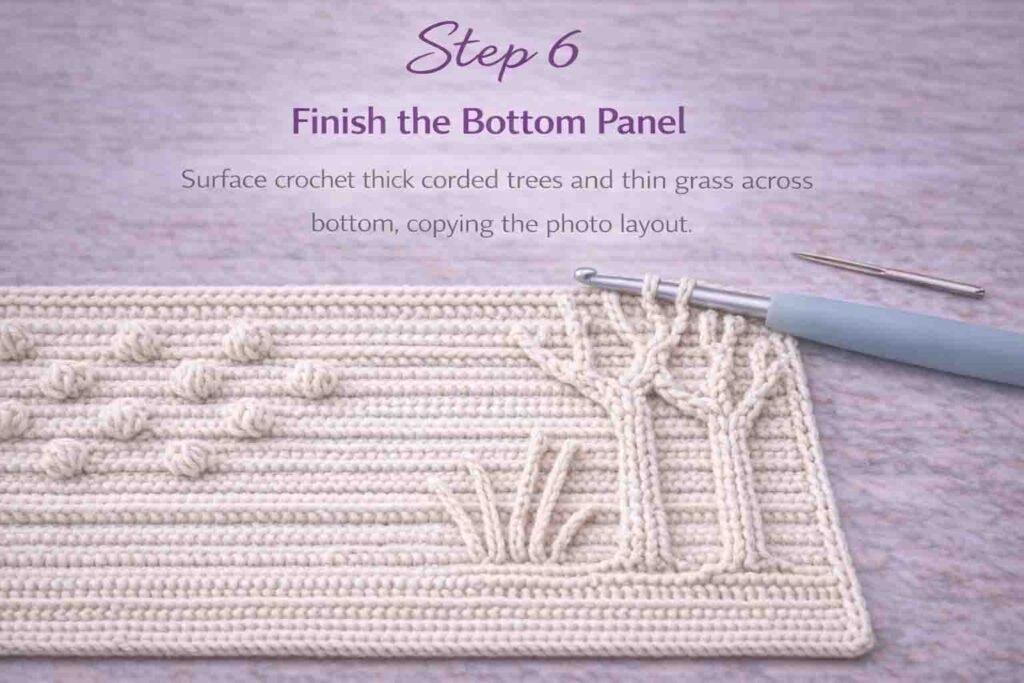
This panel in your photo has: left grass cluster + large central tree + partial right tree.
Bottom Motif Map (written size)
| Motif | Start column | Start row | Height |
|---|---|---|---|
| Grass cluster (left) | 28 | 22 | ~55 rows |
| Tall grass (left) | 40 | 30 | ~45 rows |
| Large tree (center) | 112 | 26 | ~60 rows |
| Small/partial tree (right) | 170 | 32 | ~45 rows |
You can follow these coordinates and get a very similar layout.
Grass Cluster (left)
Use surface sl st (thin raised lines).
- Stem 1: from (col 28, row 22) go up 45 rows with a gentle curve
- Stem 2: from (col 32, row 24) go up 50 rows
- Stem 3: from (col 36, row 26) go up 40 rows
Add “tips” like the photo:
- At the top of each stem: ch 3, sl st back into the same surface point (tiny bump)
- Do 2–3 little bumps per stem end.
Large Center Tree (most important)
Do the trunk thick, branches thinner.
Trunk (double line):
- Trunk line 1 (surface sc): from (col 112, row 26) go up 38 rows
- Trunk line 2 (surface sc): from (col 113, row 26) go up 38 rows
Split into two main branches:
- Branch A (surface sl st): from top of trunk, angle left up 18 rows
- Branch B (surface sl st): from top of trunk, angle right up 18 rows
Branching tips (the “hand-like” twigs in the photo):
From Branch A end:
- make 3 small twig lines: each 6–10 rows long, spreading out
From Branch B end:
- make 3–4 twig lines: 6–12 rows long
Tree “buds”
On twig ends, add tiny bumps:
- (ch 3, sl st in same point)
Do 1–2 bumps per twig.
Small/partial right tree
Same method, smaller.
- Trunk: 2 parallel surface sc lines from (col 170, row 32) up 28 rows
- Split: 2 main branches up 12 rows
- 2–3 twigs on each branch end
Top Panel Motifs (rows 169–240)
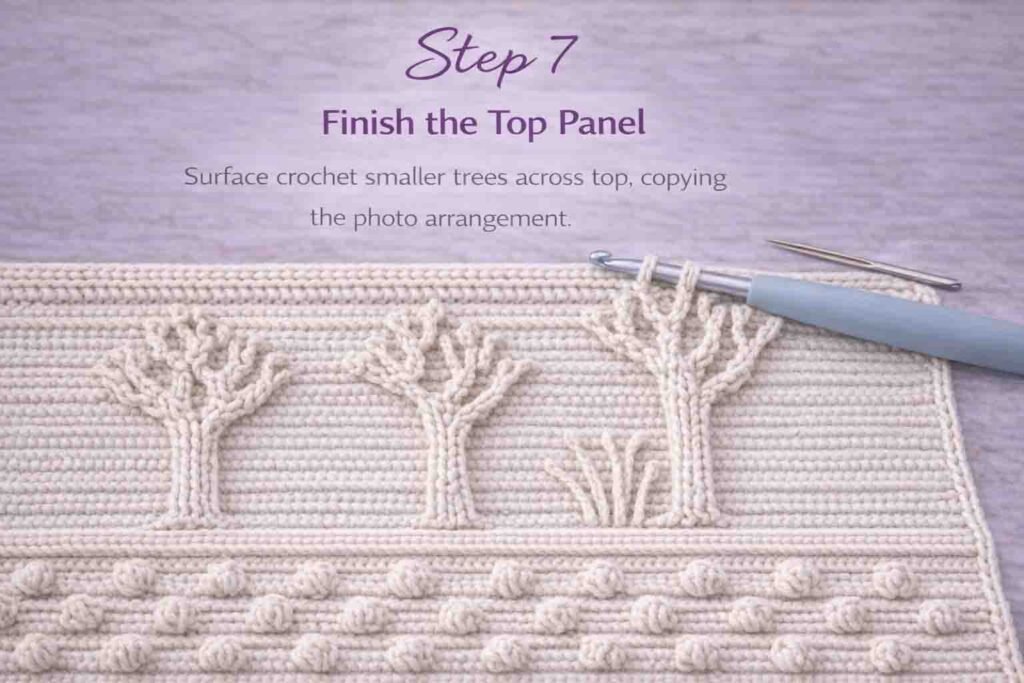
Your photo shows multiple smaller trees across the top.
Top Motif Map
| Tree | Base column | Base row | Height |
|---|---|---|---|
| Tree 1 (left) | 30 | 178 | 35 |
| Tree 2 (mid-left) | 78 | 182 | 32 |
| Tree 3 (center) | 105 | 180 | 38 |
| Tree 4 (mid-right) | 140 | 182 | 34 |
| Tree 5 (right) | 170 | 176 | 40 |
Top trees (repeatable recipe)
For each tree:
- Trunk: 2 parallel surface sc lines up 22–28 rows
- Split: 2 branches with surface sl st up 10–14 rows
- Add 3 twigs per branch (each twig 5–9 rows)
- Add 1–2 tiny bumps (ch 3, sl st) at twig tips
This repeats the same “winter tree silhouette” vibe.
Border (matches the clean frame + loops)
The photo shows a neat frame with a looped finish.
Round 1 (clean frame)
With RS facing, join yarn in any corner.
- ch 1, sc evenly around
- Corners: 3 sc in each corner stitch/space
Join with sl st.
Round 2 (thicker frame)
- ch 1, sc around
- Corners: 3 sc in corner center sc
Join.
Round 3 (optional rope edge like photo top line)
- Work reverse single crochet (crab stitch) around
Join.
Round 4 (loop edge)
This creates the visible loops like the bottom edge in your photo:
Repeat around:
- sl st in next st
- ch 4
- sl st in same stitch
- sk 1 st
At corners: don’t skip if it makes the corner pull—just place loops closer.
Fasten off and weave in ends.
Finishing (important for the “flat + premium” look)
- Weave all ends securely (especially popcorn tails and motif starts)
- Light block: dampen, lay flat, square corners
- Let fully dry so the popcorn panel stays puffy and the trees sit clean
Conclusion
These 2 Easy One-Color Baby Blanket Crochet Designs prove that simple stitches can create something truly beautiful.
Whether you prefer texture or a lighter feel, each design is beginner-friendly and easy to customize. Try one today and enjoy making a soft, timeless blanket that will be treasured for years.